Enjoy 5% OFF + FREE shipping on orders $49+! Use Code: 202512AK5

VR Lens Installation Guide
Follow this step-by-step VR lens installation guide to install your ANNKUTVR prescription lens inserts correctly. Choose your headset or AR glasses below, watch the installation video, and follow the simple steps to get a clear and comfortable viewing experience.
Official Guide
By ANNKUTVR team
Easy to Follow
Video & Image Instructions
Need Help?
Contact our support
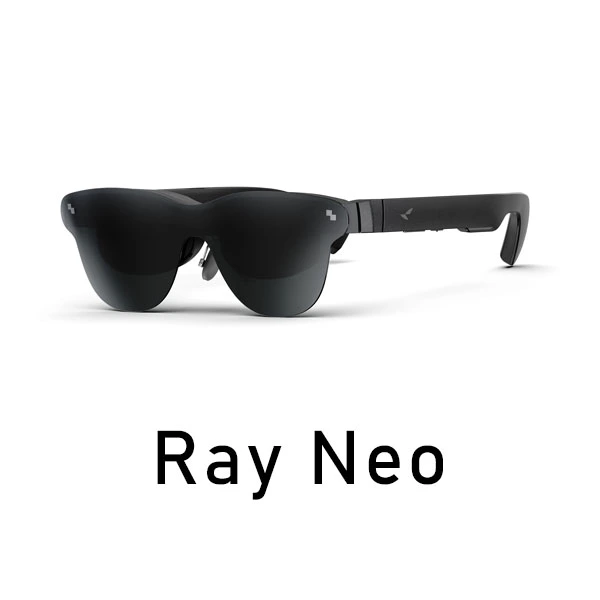
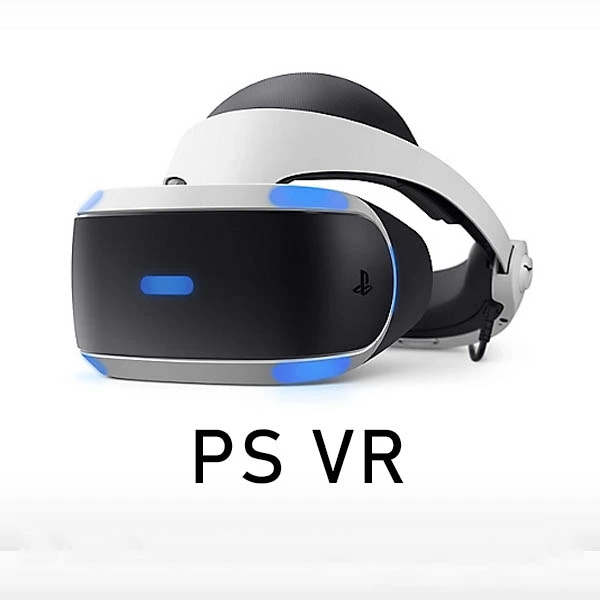
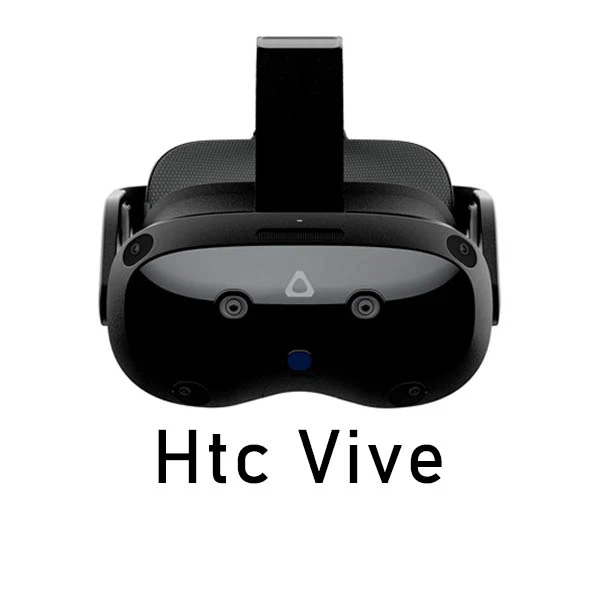
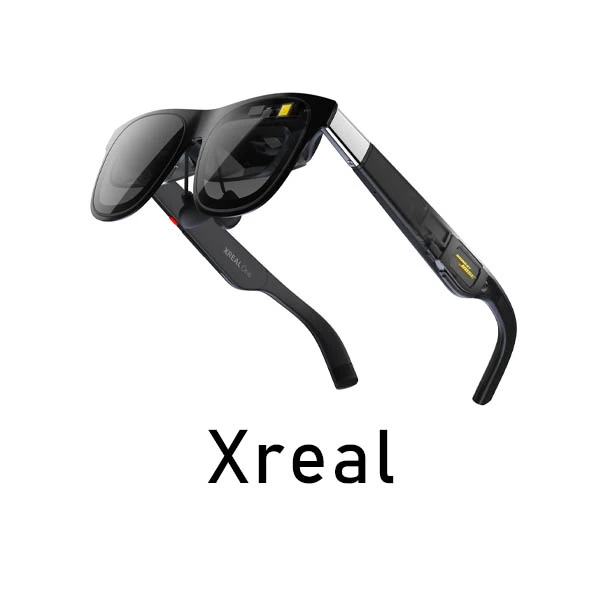
Choose Your Device
Click your device category below to jump to the installation guide.


More Videos
Before You Install Your VR Prescription Lenses
Clean Your Lenses
Use a clean microfiber cloth to gently wipe the headset lenses and prescription lens inserts before installation.
Check Left and Right
Make sure the left and right lens inserts are matched correctly. Look for the L/R marks or prescription labels before placing them into the headset.
Check Sticker Direction
If your lens insert has a protective sticker, make sure the sticker faces outward and away from your eyes unless the product instructions say otherwise.
Handle with Care
Hold the lens insert by the frame. Avoid touching the optical surface directly to prevent fingerprints, scratches, or dust.
Installation Guides for Popular Device Categories
Select your device to watch the installation video and follow the steps.
RayNeo air 4 pro
Watch the video below to install prescription lens inserts on RayNeo Air 4 Pro.
- Hold the insert by the frame.
- Check the left and right marks.
- Align the insert with the glasses frame.
- Attach it gently until it sits in place.
- Make sure the insert is secure and comfortable.
Meta Quest 2 / Quest 3S
Use this guide to install your prescription lens inserts for Meta Quest 2 or Meta Quest 3S.
- Clean the headset lenses with a microfiber cloth.
- Check the L/R marks on the lens inserts.
- Place each insert over the correct headset lens.
- Press the frame gently until it fits into position.
- Put on the headset and check whether the view is clear.
Meta Quest 3
Watch the video below to install your ANNKUTVR prescription lenses on Meta Quest 3.
- Identify the left and right prescription lens inserts.
- Hold the lens insert by the outer frame.
- Align the insert with the headset lens shape.
- Press gently until the lens insert sits securely in place.
- Check that both lenses are stable before wearing the headset.
Valve Index
Follow this video guide to install ANNKUTVR prescription lenses on Valve Index.
- Make sure the headset lenses are clean and dry.
- Match the left and right prescription inserts.
- Align the insert with the original Valve Index lens.
- Push gently around the frame until it is secure.
- Adjust the headset and check your viewing comfort.
HP Reverb G2
This guide shows how to install prescription lens inserts on HP Reverb G2.
- Remove dust from the headset lenses before installation.
- Check the left and right lens inserts carefully.
- Align the insert with the lens housing.
- Press lightly until the frame fits in place.
- Confirm the lenses are secure before use.
Pico 4
Use the video guide below to install your prescription lens inserts on Pico 4.
- Clean the Pico 4 lenses before installing the inserts.
- Confirm the left and right sides.
- Place the insert over the correct headset lens.
- Press gently and evenly around the frame.
- Make sure the insert is stable and does not move.
Pimax Crystal
For optimal comfort, we recommend using the Pimax Crystal Super prescription lenses with the thicker foam pad in your Pimax package.
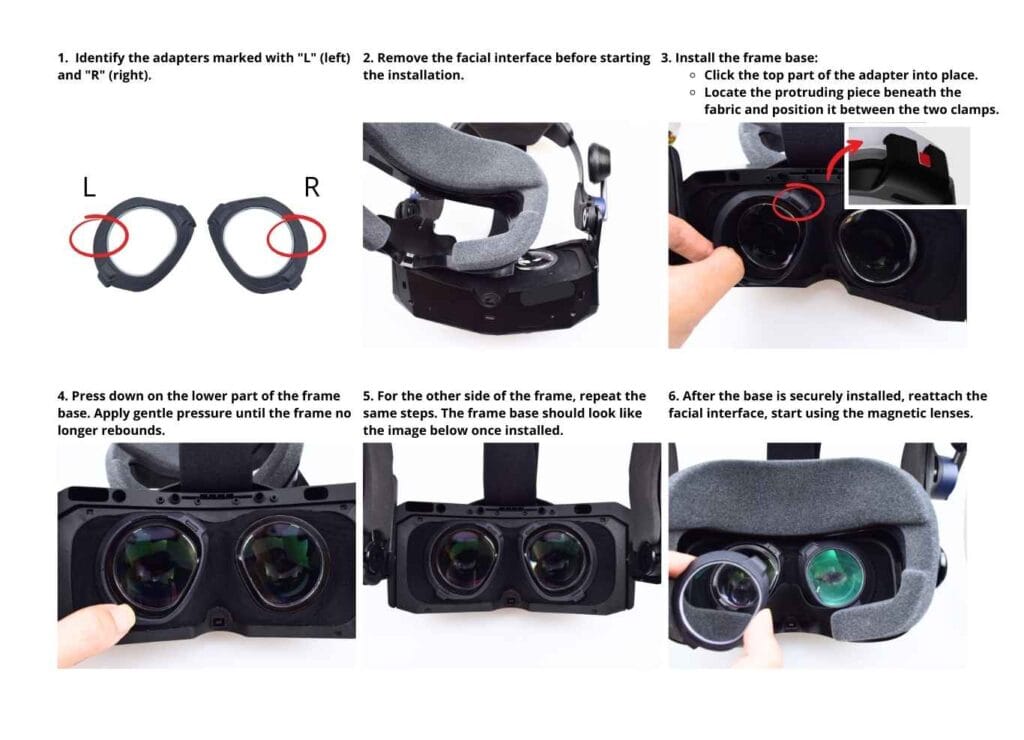
Pimax 5K/8K/8KX
Follow this installation guide for supported Pimax headsets, including Pimax Crystal, Pimax 5K, Pimax 8K, and Pimax 8KX.
- Check that your lens inserts match your Pimax model.
- Clean the headset lenses and lens inserts.
- Match each insert to the correct side.
- Align the insert with the headset lens area.
- Press gently until the insert is fitted securely.
PSVR
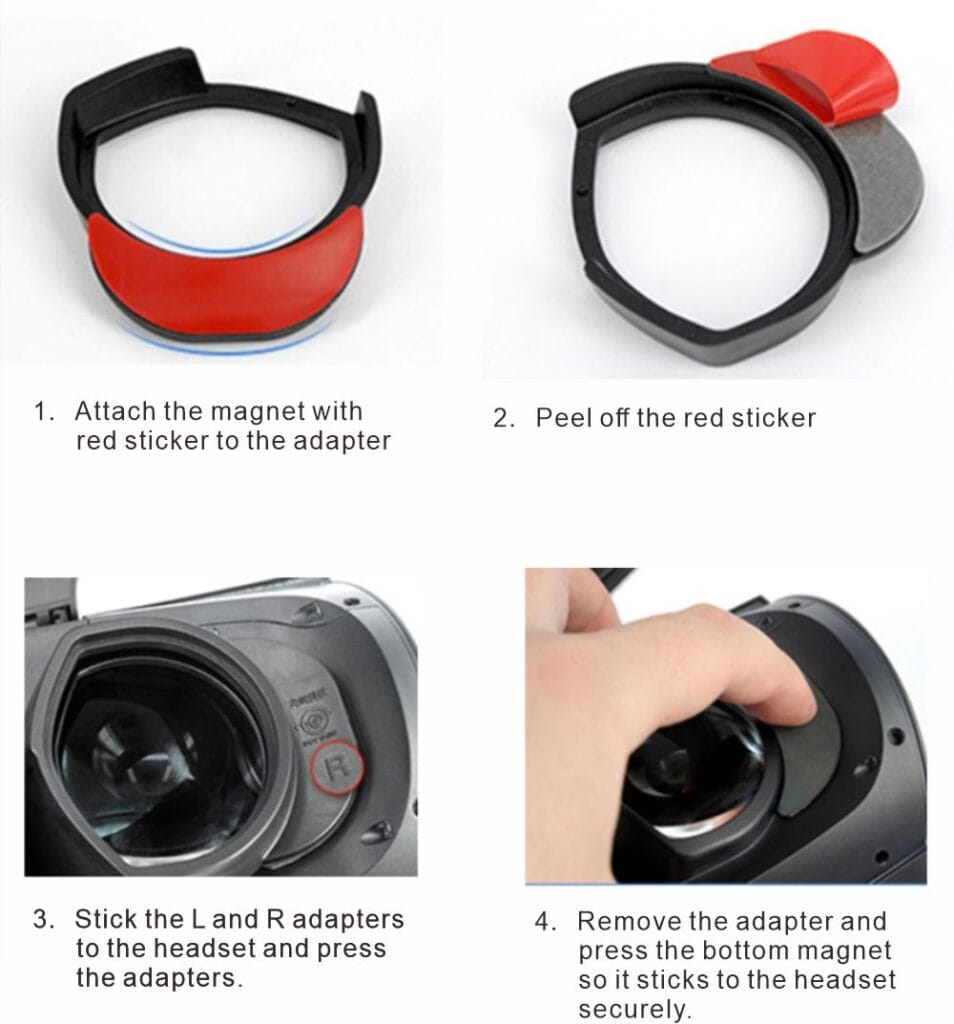
PSVR 2
This guide helps you install ANNKUTVR prescription lens inserts on PlayStation VR2.
- Clean the PSVR 2 lenses before installation.
- Check the left and right marks on the inserts.
- Align each insert with the headset lens.
- Press the frame gently into place.
- Wear the headset and check that the view is clear and comfortable.
HTC VIVE
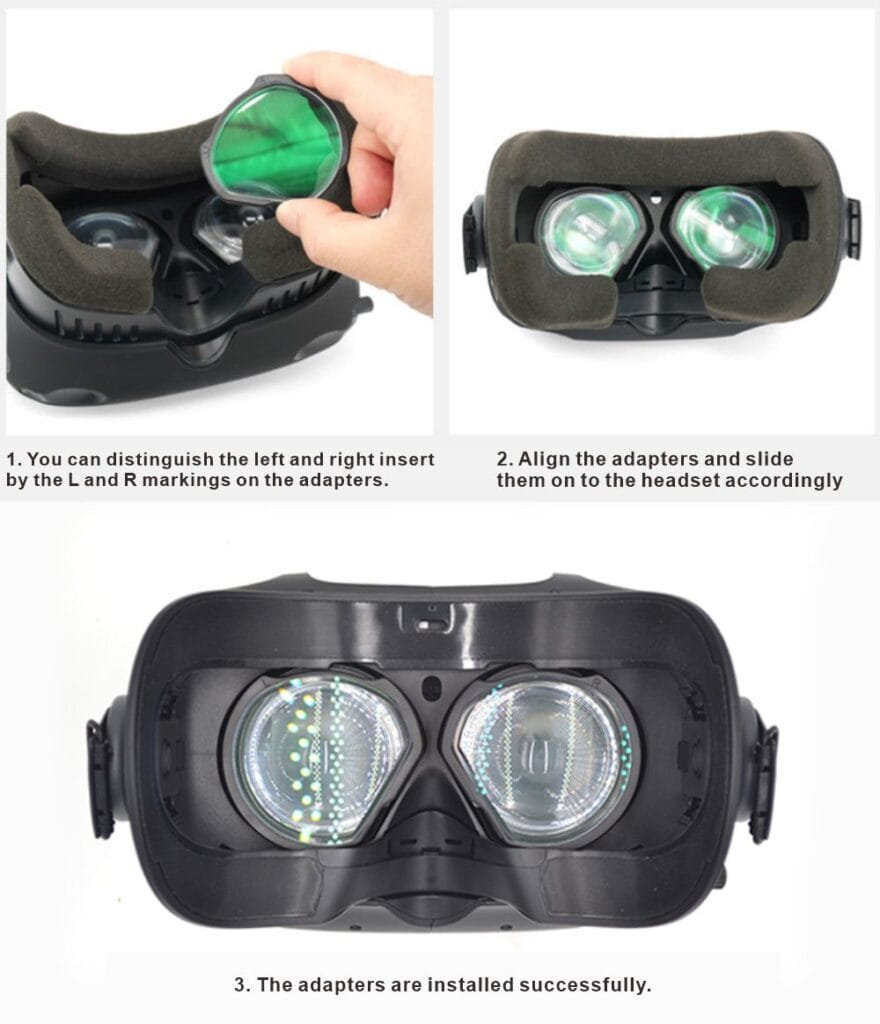
HTC Vive Pro 2
DJI FPV
Follow this guide to install prescription lens inserts for DJI FPV Goggles.
- Make sure the goggles are turned off before installation.
- Clean the lens area with a microfiber cloth.
- Check the left and right prescription inserts.
- Align the insert carefully with the goggles lens area.
- Press gently and check that the insert is secure.
DJI Goggles 3
Stay tuned…
XREAL Air
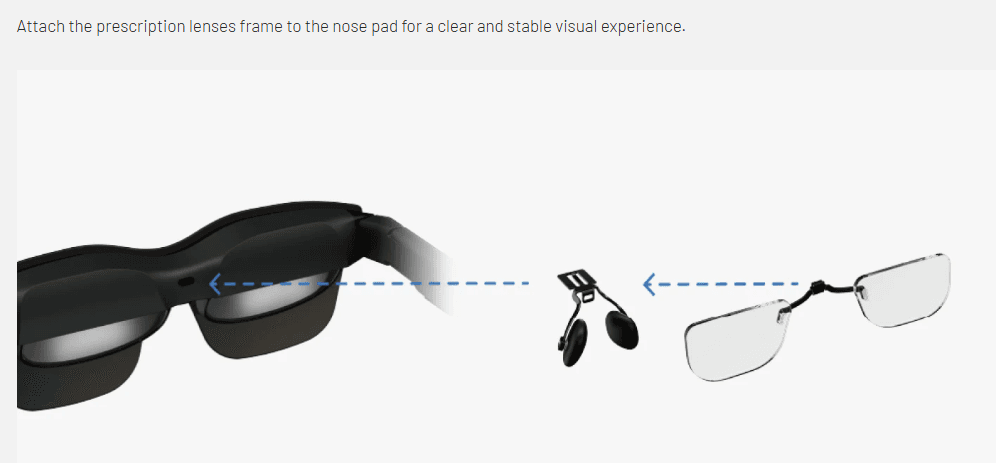
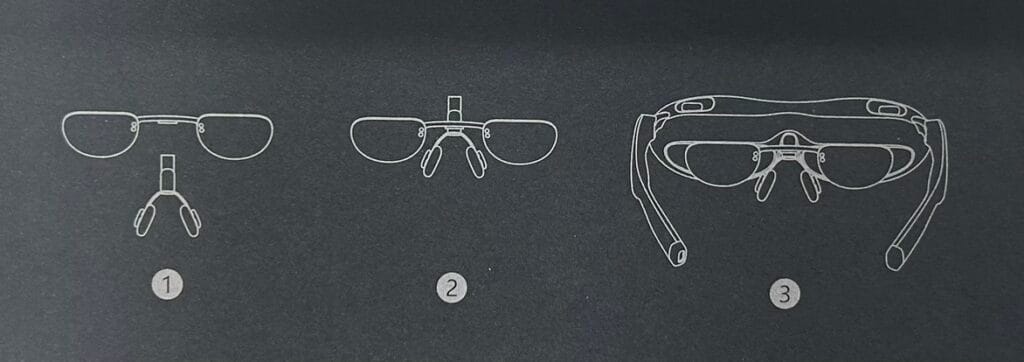
Watch the video below to install prescription lens inserts on XREAL Air glasses.
- Clean the XREAL Air lens area before installation.
- Check the left and right prescription inserts.
- Align the insert with the glasses frame.
- Attach the insert gently until it sits correctly.
- Put on the glasses and check whether the image is clear.
XREAL Air 2
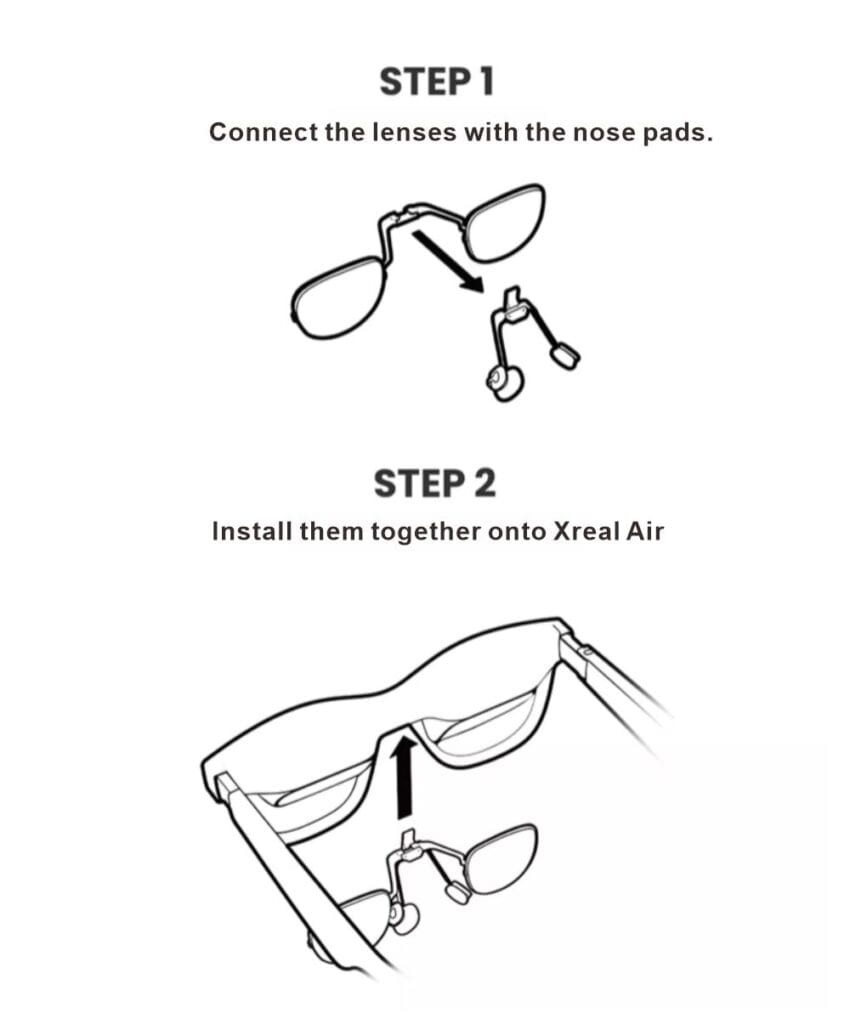
XREAL One
Note for XREAL One Pro lenses: When cleaning the lenses, be careful of the silicone nubs on both sides, as wiping may dislodge them. If they are lost, please replace them with the silicone nubs from the extra frame of the One Pro packaging.
Please note that the lenses for the XREAL ONE and XREAL ONE Pro are different, but the installation process is the same. We use the XREAL ONE as an example below, which applies equally to the installation of XREAL ONE Pro lenses.
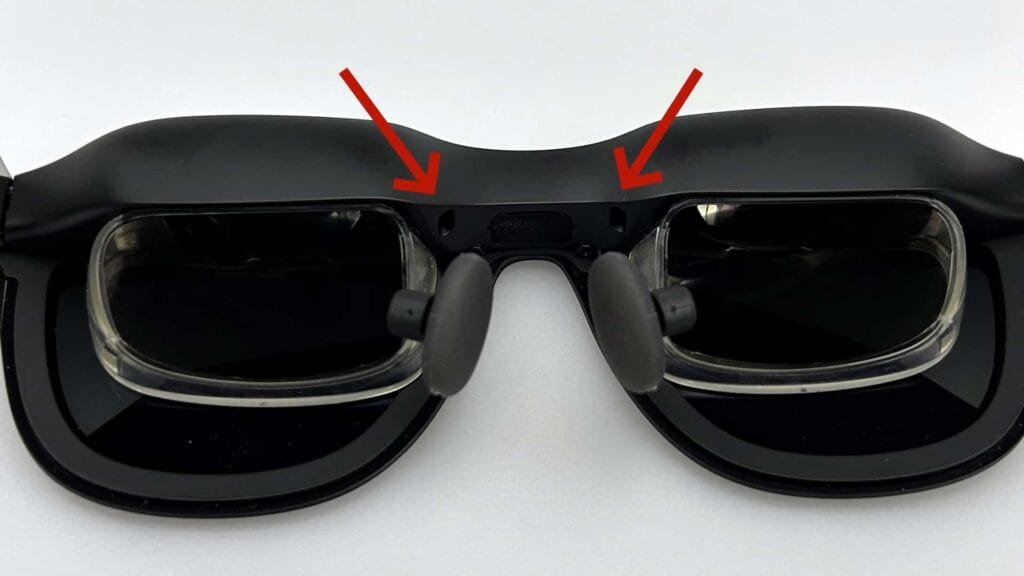
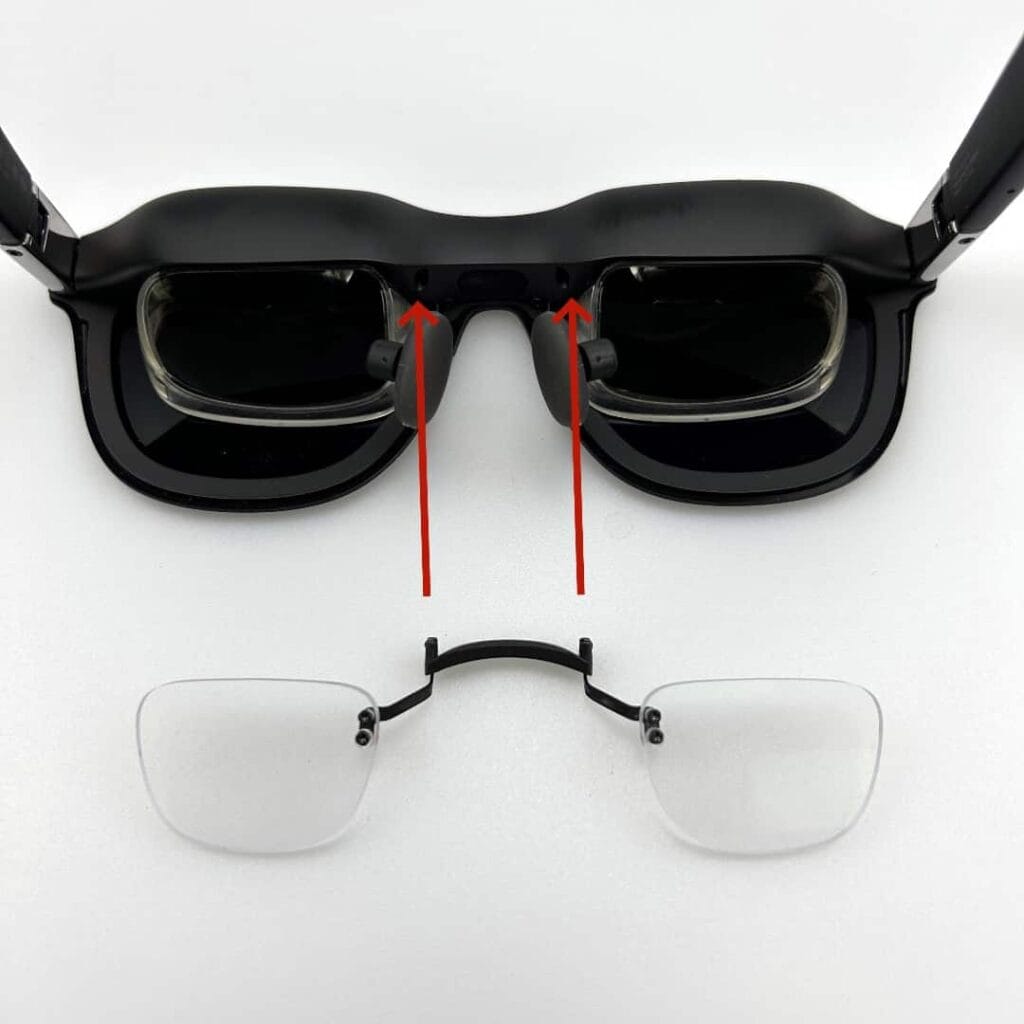
Step 1: Remove the two rubber pieces indicated by the red arrows. You can use a SIM card ejector pin or a small screwdriver to carefully pry them out.
Step 2: Insert the lenses into the two holes.
Rayneo Air 2s
Rokid Max
How to Clean Your VR Prescription Lenses
1. Rinse
Rinse the lenses gently with clean water to remove dust or small particles.
2. Clean
Use a microfiber cloth with a small amount of mild soap if needed. Wipe gently in one direction.
3. Rinse Again
Rinse away any soap residue before drying the lenses.
4. Dry
Air dry the lenses or use a clean microfiber cloth. Do not use paper towels, alcohol wipes, or rough fabric.
Installation FAQ
Will these lenses affect my VR experience?
No. ANNKUTVR prescription lens inserts are designed to provide a clear and comfortable viewing experience without needing to wear glasses inside your headset.
What should I do if the lens insert does not fit?
Do not force it. Remove the insert, check the left and right sides, confirm your headset model, and try again gently. If it still does not fit, please contact our support team.
How do I know which lens is left or right?
Most lens inserts include L/R marks or prescription labels. Always check these marks before installation.
Can I use my headset without the prescription lens inserts?
Yes. You can remove the lens inserts when needed. Store them in a clean case to prevent dust and scratches.
Can I clean the lenses after installation?
Yes, but we recommend removing the inserts for deeper cleaning. This helps avoid pressure on your headset lenses.
Why does the image still look blurry after installation?
Please check whether the left and right lenses are installed correctly, make sure the lenses are clean, and confirm that your prescription information is accurate.
Can I remove and reinstall the lenses multiple times?
Yes. The inserts are designed to be removable. Handle them gently and avoid bending or twisting the frame.
Do I need tools to install the lenses?
No. Most ANNKUTVR prescription lens inserts can be installed by hand without tools.
Still Need Help?
Our support team is here for you.
Lorem ipsum dolor sit amet, consectetur adipiscing elit. Ut elit tellus, luctus nec ullamcorper mattis, pulvinar dapibus leo.
📧Email: info@annkutvr.com
⏰Live Chat: Mon-Fri 9AM-6PM
Need Lenses for Your Device?
Find the perfect prescription lenses for your VR headset or AR glasses.
Free Shipping
On orders over $49
14-Day Returns
Rapid Processing
24/7 Support
Solve problems quickly
Secure Payment
SSL encrypted