Enjoy 5% OFF on all orders over $49 + FREE shipping! Use code: 202512AK5
How To Install PSVR2 Prescription Lenses Insert (Step-By-Step Guide & Review)
Table of Contents
Introduction: Player Pain Points
💡 Quick Start: Looking for the Magnetic Inserts mentioned in this guide? You can get the [ANNKUTVR PSVR2 Prescription Lenses Insert here](Fast Shipping & Secure Fit).
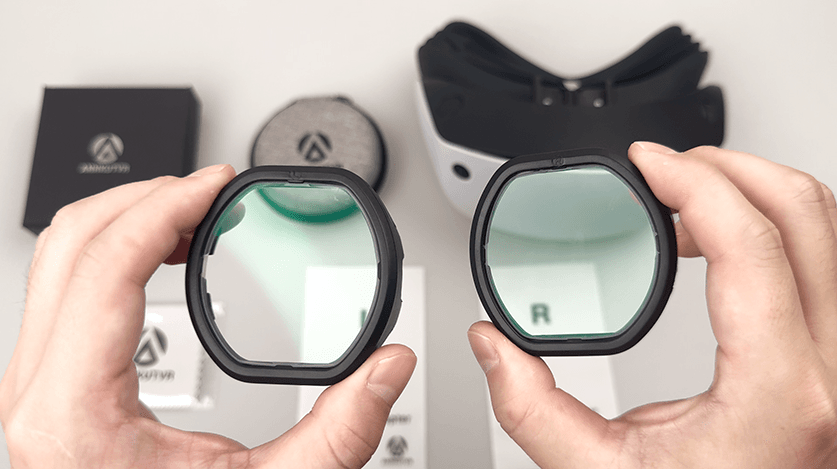
As a VR lens reviewer and streamer, I received a pair of ANNKUTVR prescription lenses for PSVR2—and just like many players, my initial instinct was excitement mixed with hesitation. Before we dive into the installation steps, let's talk about the common pain points players usually worry about:
Is it difficult to install? Many fear damaging the delicate Fresnel lenses.
Will eye‑tracking or focus be affected? Correct alignment is critical.
Could the inserts be too bulky, uncomfortable, or impact nose fit?
Will installing damage warranty or leave residue?
Are magnetic mounts secure, or will they detach mid-session?
In this guide, I’ll walk you through how to install PSVR2 prescription lenses easily and safely tip I picked up from forums, show real Reddit feedback on the pros and cons, answer FAQs, and share why ANNKUTVR lenses impressed me—plus I’ll include a video at the end for visual reference.
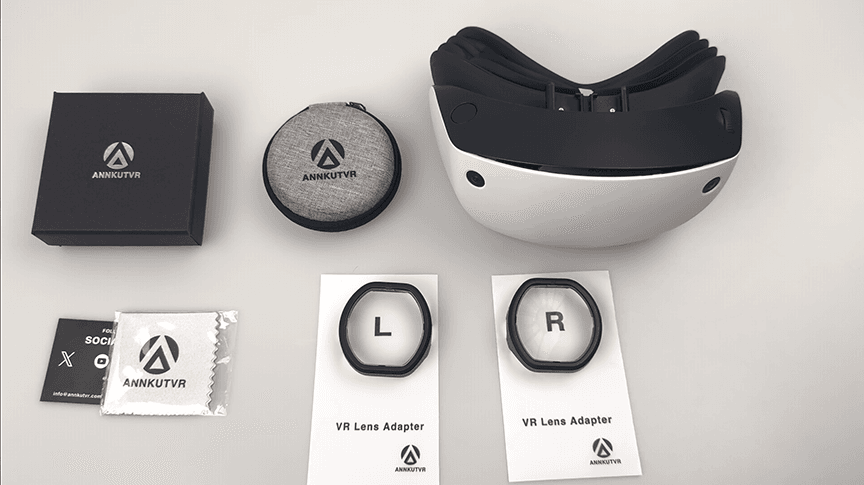
Step-by-Step Installation Guide to Install PSVR2 Prescription Lenses
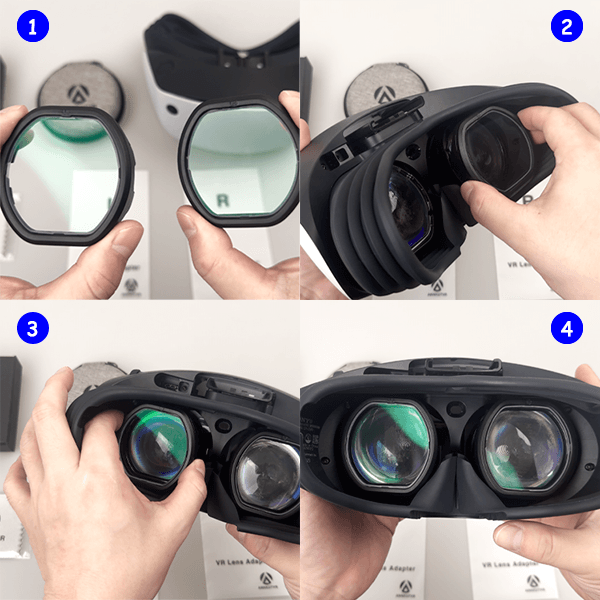
- Prepare a clean workspace and power off headset
Always turn off your PS5 and unplug the PSVR2. Place it on a soft, clean surface to avoid scratches. Remove the facial interface
Gently push the clips outward and slide the faceplate off to access the PSVR2 Fresnel lenses.Clean the original lenses if needed
Before you install PSVR2 prescription lenses, make sure to clean the Fresnel lens surface.Use a micro-fiber cloth or blower to remove dust.Align ANNKUTVR prescription lens insert
Slot the magnetic base plate or clip-on frame carefully onto the front of the Fresnel lens—ensure it clicks or snaps in place.Attach the prescription insert
The magnetic insert snaps securely—rotate slightly to confirm alignment. You should feel a subtle click.Replace the facial interface
Gently snap it back, aligning the tabs—ensure there’s no friction on the lens surface.- Power on and check clarity
Boot the headset and look for immediate clarity improvement or any misalignment. Adjust if needed.
Special Installation Tip
One particularly helpful tip I found on GTPlanet’s PSVR2 forum states:
“Rather than relying on the warranty, I would highly recommend getting some prescription lens covers … they completely remove the risk … they stay in a fixed place.” ——From GTPlanet.net
This supports using magnetic inserts or protective shields to safeguard the original Fresnel lens from scratches.
Real User Insights: Pros and Cons from Reddit
Let's hear directly from the community:
“They’re easy to install … magnetic ones … clip around the lenses, then the actual glass just magnetises on.” — ohSpite.
“These lenses add another 100 euros … but I’m okay with paying for a comfortable and good experience (and that also doesn’t risk that my glasses get scratched).” — wutwutwutwhat_
“My vision in the menu in all my games improved especially around the edges of my screen … The upside outweigh the downside…” — ReeferMon420
On the con side:
These reflect the benefits—clarity, comfort, lens protection—but also the tradeoff with field-of-view and headset fit.
FAQs: Installing PSVR2 Lenses
- Will eye‑tracking still work?
Yes—if the insert is seated flat and aligned with the Fresnel lens. ANNKUTVR’s design ensured zero tracking issues for me. - Do inserts scratch the headset lens?
Not if installed carefully. The magnetic insert acts as a buffer and protects the original lens. - Can I play with glasses and still use the insert?
Yes, you won’t need to wear glasses inside—just use your prescription insert. - Do magnetic types come loose?
No, ANNKUTVR’s inserts snapped securely. But avoid wiping the area rashly to prevent dislodging. - Can I uninstall later?
Absolutely—removal is easy with a slight friction pull—no wear on the original lens. - Can I install PSVR2 prescription lenses myself without tools?
Yes, of course. You can see how easy it is to install the PSVR 2 prescription lenses in our tutorial video.
Why ANNKUTVR Lenses Are Worth It
After installing and testing the ANNKUTVR PSVR2 prescription lenses, here’s what stood out:
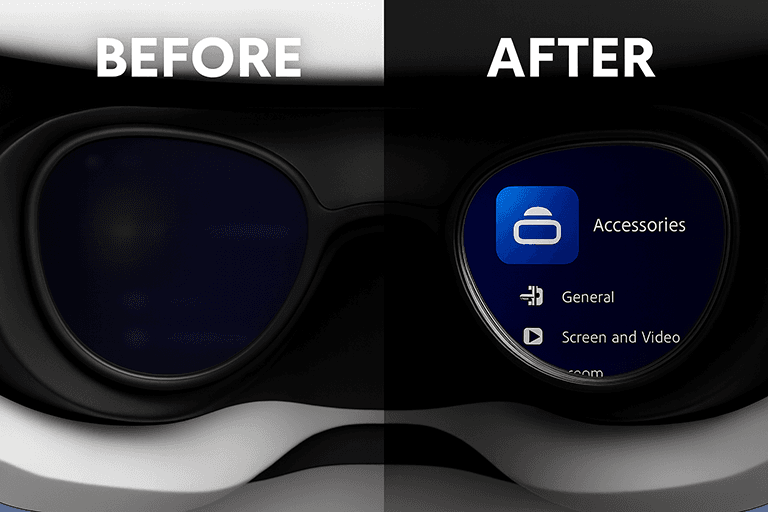
Crisp clarity—Visual detail is significantly sharper, especially in peripheral menus and readouts.
Protection plus convenience—No glass frames pressing on my face, and I avoid scratching the headset lens.
Secure magnet fit—Stable during rapid head movements in rhythm games.
Easy future removal—Swapping out for others or cleaning takes seconds.
These qualities make ANNKUTVR’s PSVR2 prescription lens inserts not just an upgrade, but a long-term comfort investment.
Watch the Installation in Action
To ensure a smooth experience, here’s the installation video I recorded. It walks through every step clearly and shows the real-time clarity improvement.
Conclusion
Installing PSVR2 prescription lenses may seem daunting, but with proper steps and a stable design like ANNKUTVR’s, it’s simple, safe, and highly effective.If you’re planning to install PSVR2 prescription lenses, ANNKUTVR provides one of the most reliable and easy-to-use options available today. You gain crystal-clear vision, lens protection, and a more comfortable VR experience—without compromising performance. For anyone who wears glasses or values visual fidelity and longevity, this is a game-changer.

