Enjoy 5% OFF on all orders over $49 + FREE shipping! Use code: 202512AK5
How to install your lenses
Meta Quest 2 / Quest 3S
Meta Quest 3
Valve Index
HP Reverb G2
Pico 4
Pimax Crystal
For optimal comfort, we recommend using the Pimax Crystal Super prescription lenses with the thicker foam pad in your Pimax package.
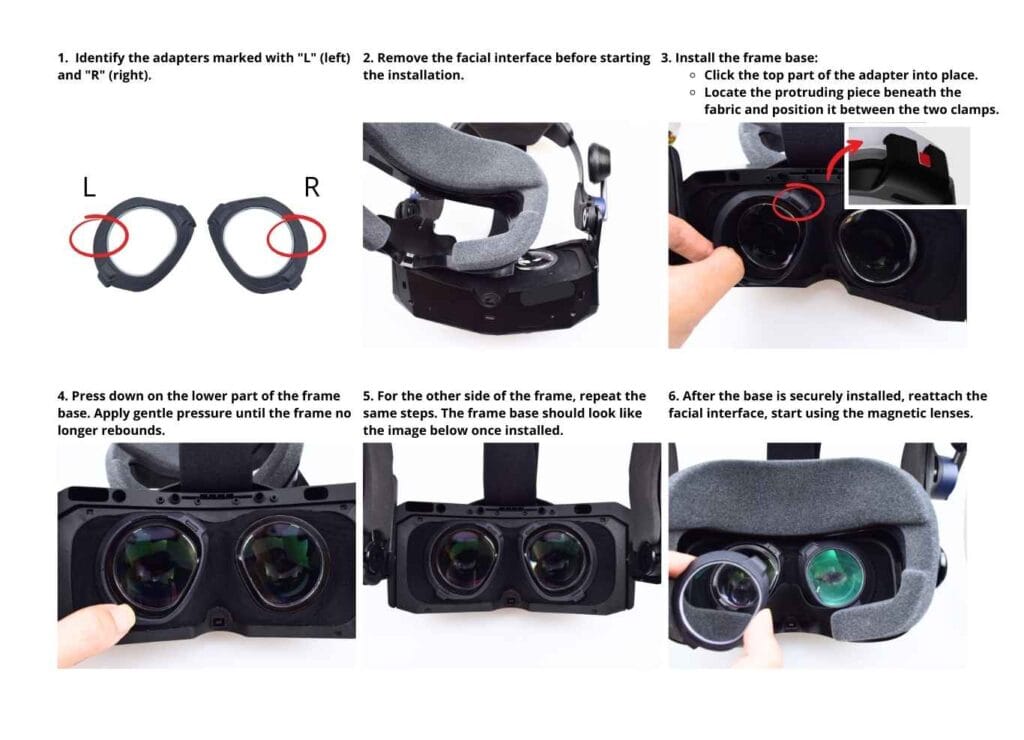
Pimax 5K/8K/8KX
PSVR
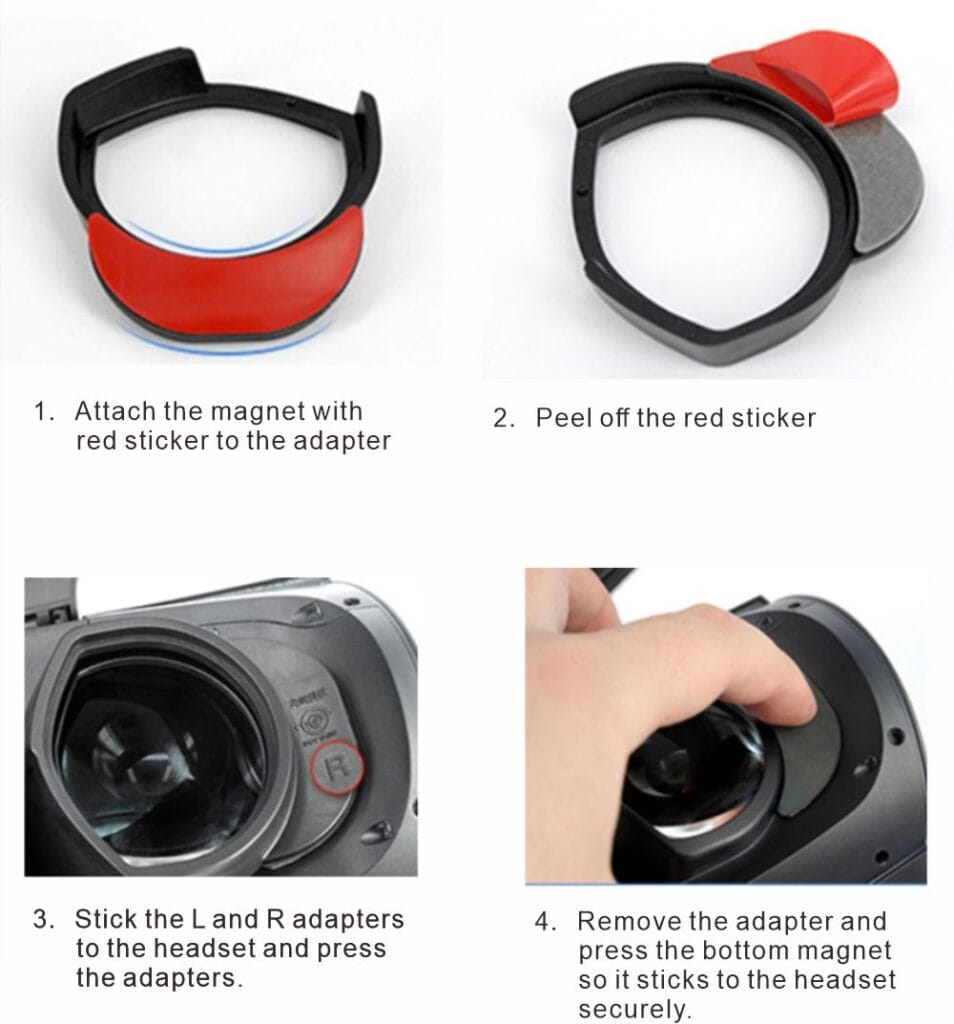
PSVR 2
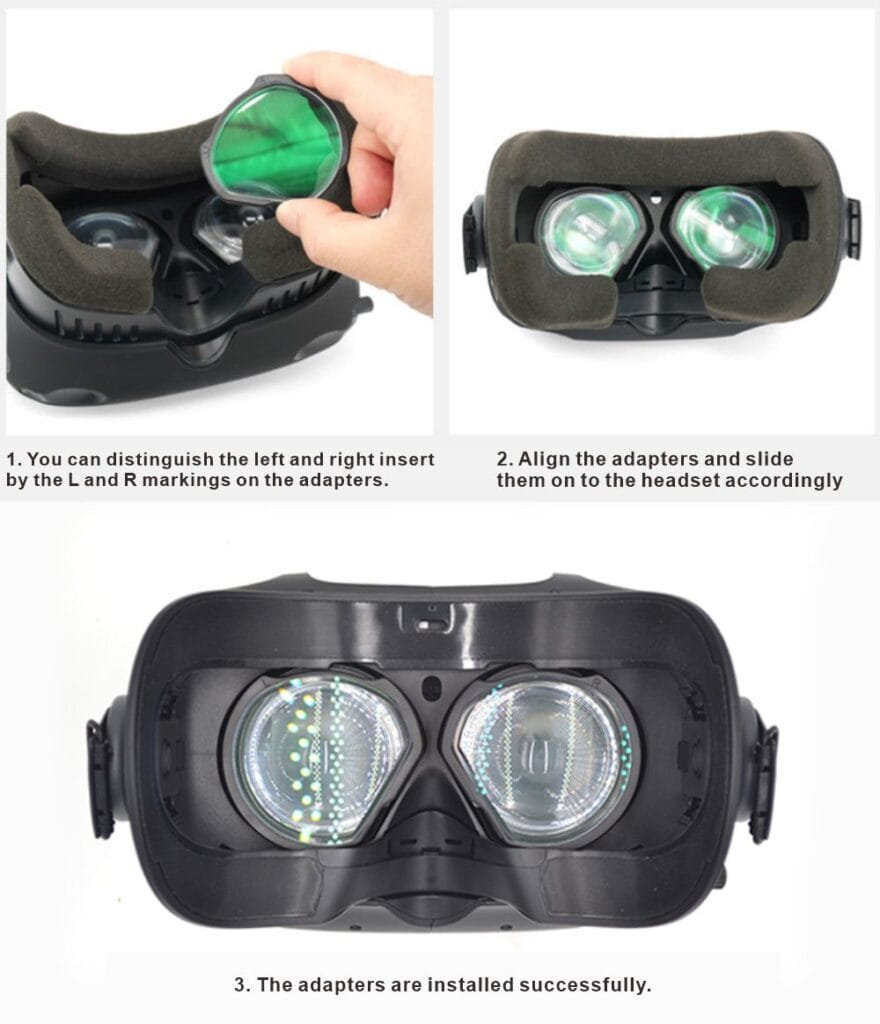
HTC VIVE
DJI FPV
DJI Goggles 3
Note: The side of the lens with the sticker should face the goggles.
Due to limited space between the prescription lenses and the goggle lenses, we recommend keeping the protective sticker on until you’ve successfully completed your first installation. This helps prevent scratching the prescription lenses during the installation process.
After installation, avoid pressing on the prescription lenses as they may sink down and make contact with the goggle lenses. While this typically won’t damage your goggle lenses, it can create a dimple in the center of the prescription lenses. If cleaning is needed, it’s best to remove the lenses first.
Important: Do not use the frames that come pre-installed on the goggles, as they are not designed for prescription lenses. Your DJI package includes a separate pair of frames specifically designed for prescription lens installation.
Here is the official video tutorial. You can see what the frames look like at 00:13 in the video.
XREAL Air
XREAL Air 2
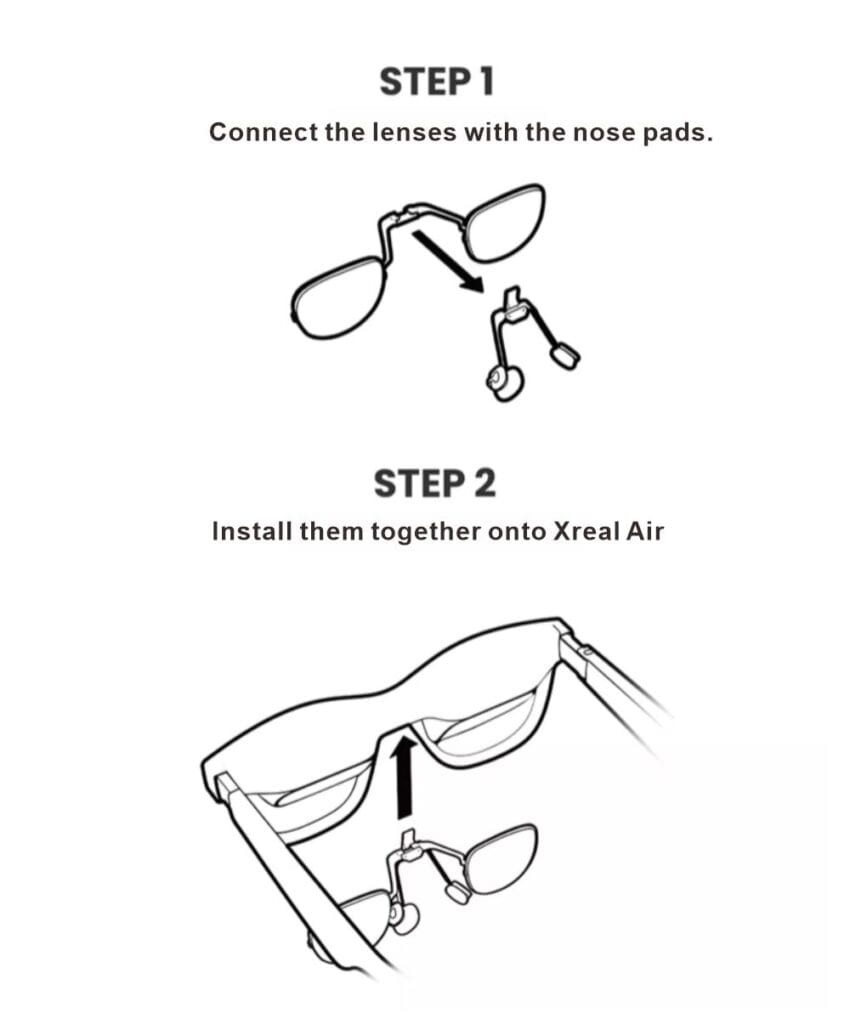
XREAL One
Note for XREAL One Pro lenses: When cleaning the lenses, be careful of the silicone nubs on both sides, as wiping may dislodge them. If they are lost, please replace them with the silicone nubs from the extra frame of the One Pro packaging.
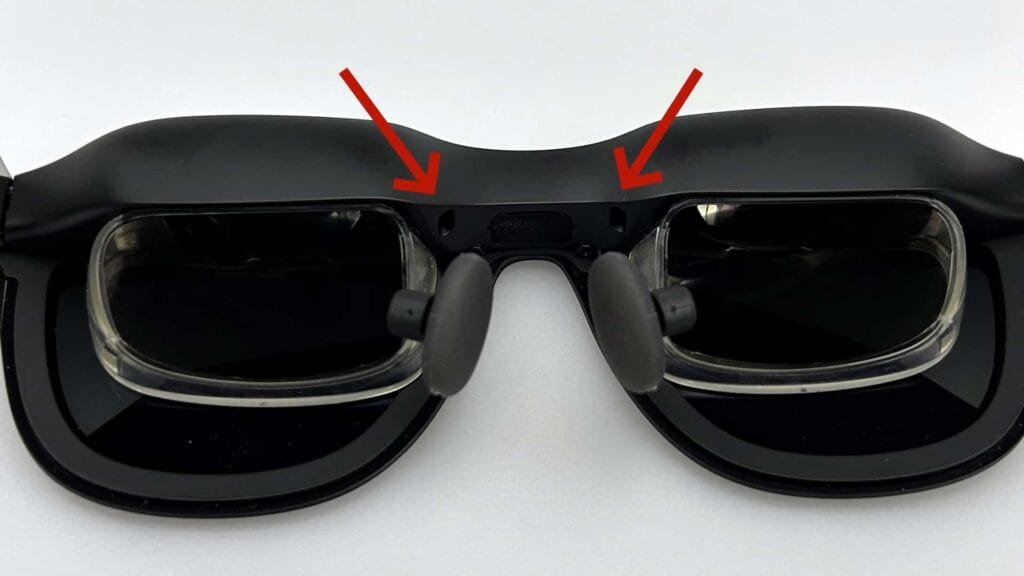
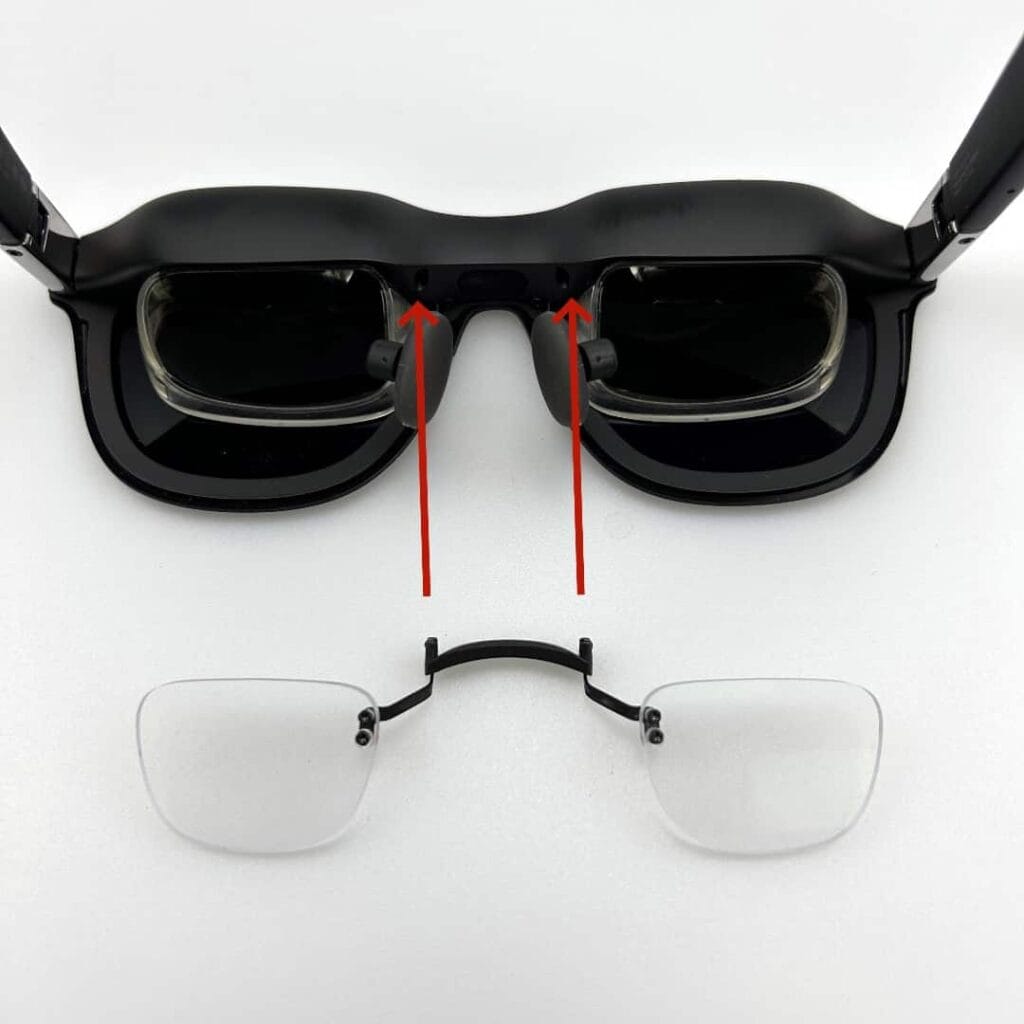
Please note that the lenses for the XREAL ONE and XREAL ONE Pro are different, but the installation process is the same. We use the XREAL ONE as an example below, which applies equally to the installation of XREAL ONE Pro lenses.
Step 1: Remove the two rubber pieces indicated by the red arrows. You can use a SIM card ejector pin or a small screwdriver to carefully pry them out.
Step 2: Insert the lenses into the two holes.
Rayneo Air 2s
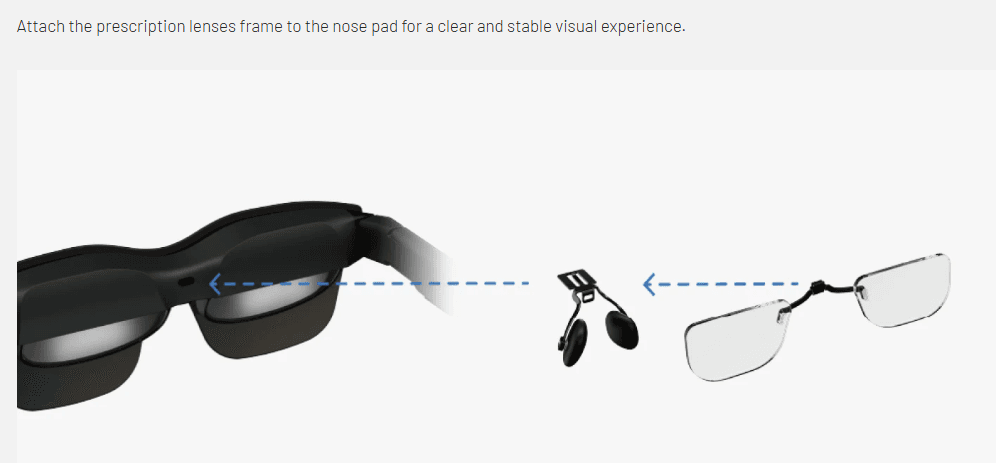
Rokid Max
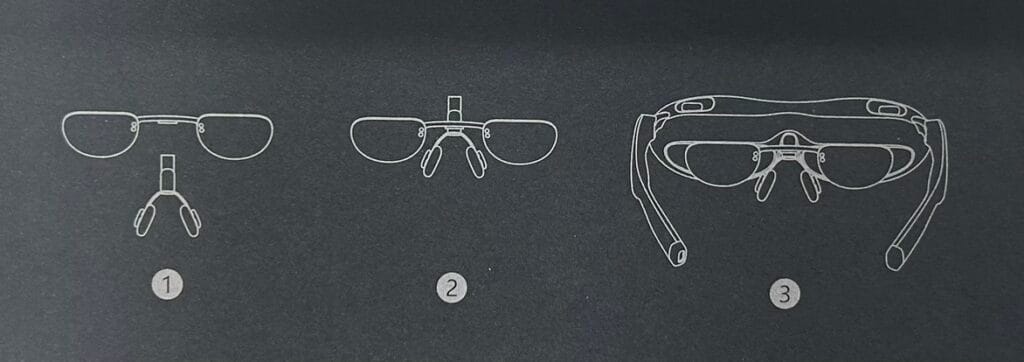
Ray-Ban Meta
How to clean your VR prescription lenses
The ANNKUTVR prescription lenses are crucial to getting a crisp and focused view of the VR World. Once the steps are mastered, a lens cleaning routine need not be complicated. If cleaning your lenses takes longer than twenty seconds, you are likely overcomplicating the process.
Supplies
1. Microfiber cloth: The best and safest way to avoid scratching or smudging your lenses while cleaning them.
2. Cleaning solution: Spray formulated for eyeglasses that specifies it is safe for polycarbonate lenses and lens coatings is optimal, however lotion-free dish soap can also be used.
Directions
1. Always practice good hand hygiene to avoid spreading germs from your hands to your contact lenses.
2. Run warm water over your lenses to get rid of dust or other things that might scratch the lenses. If you live somewhere with hard water, you should avoid using tap water in favor of distilled water.
3. Wipe your lenses down with microfiber cloth.
4.Spray both sides of your lenses with cleaning solution. If using dish soap, place a single drop on each side of the lens and massage it gently over the surface. Rinse if using soap.
5. Shake off any remaining water on your lenses and then dry them. Use gas duster (canned air) to dry your lenses instead of a paper towel to prevent streaks and watermarks.
If you have any questions or need help, please contact us.
